Introduction to the Hobbyeagle A3 Super 4 Gyro
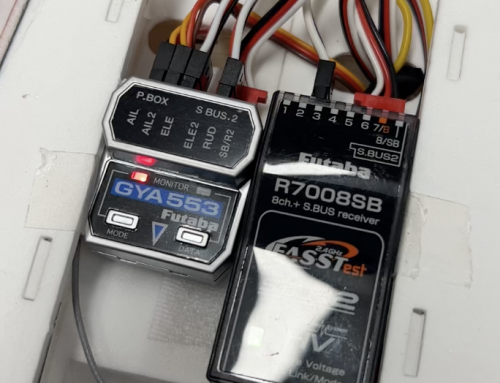
The Hobbyeagle A3 Super 4 is a 6-axis gyro that offers an incredibly affordable solution for RC aircraft stabilisation. At just £22, you can buy six of these for the price of a single Futaba GY531 gyro, which retails at £150. Despite the massive price difference, this gyro claims to have all the functionality you need for stable flight.
In this article, we’ll cover the unboxing, configuration, installation, and setup process to help you get this gyro working in your aircraft.
What’s in the Box
The Hobbyeagle A3 Super 4 comes with everything you need to get started:
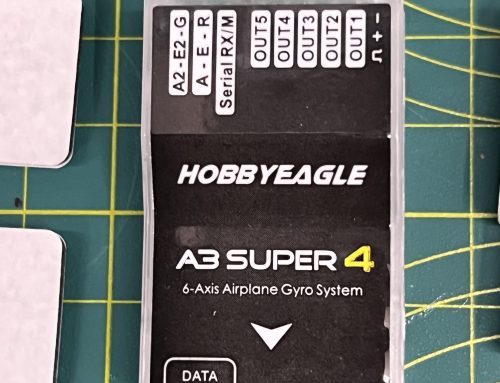
- The gyro unit itself, with a data connection port at one end and five output ports for servos
- Input ports at the top labelled A, E, R (aileron, elevator, rudder), plus serial RX and M ports
- A USB data cable
- A card with a QR code for accessing the manual
- Specialised wiring harnesses with split connectors
- Two sticky pads for mounting
- A USB adapter for the data cable
The split-wire connectors are particularly interesting – one end has a standard servo connector, whilst the other end splits into three separate connections. These allow you to connect individual channels from your receiver to the gyro, providing an alternative to S.Bus connection.
Supported Receivers and Protocols
One of the strengths of this gyro is its versatility. It supports multiple receiver types and protocols:
- PWM protocol (standard servo signals)
- S.Bus receivers (single-line connection)
- Spektrum receivers
- Spektrum SRXL2 receivers
This broad compatibility means you can use cheaper receivers rather than being forced into expensive high-end options, which is sometimes the case with other gyros.
Critical Installation Notes
Gyro Calibration on Power-Up
After powering on, the gyro needs to perform an accurate calibration. During this process:
- Don’t move the transmitter sticks
- Leave the throttle stick down
- Keep the aircraft level on the floor
- Don’t hold or wave the aircraft about
- Wait for the calibration to complete (usually a few seconds, followed by a beep)
You’ll probably see all the control surfaces twitch slightly during initialisation. This is completely normal.
Mounting Direction
The gyro has an arrow on the unit that must point towards the front of the aircraft. This is absolutely critical. Whilst the gyro can be mounted in various orientations (upright, on its side, or even upside down), the arrow must always point forward.
If you’ve mounted it on its side or upside down, you’ll need to change the configuration in the gyro settings to reflect this orientation. Failure to do so will result in incorrect stabilisation and likely a crash.
Supported Wing Types
The gyro supports various aircraft configurations:
- Standard wing: Traditional setup with separate aileron, elevator, and rudder servos (can support dual servos on ailerons or elevator)
- Delta wing: Where ailerons also function as elevator controls
- V-tail: Where the V-tail surfaces provide both rudder and elevator movements
Note: This is not a helicopter gyro, as clearly stated on the packaging.
Understanding Flight Modes
The gyro offers multiple flight modes that can be assigned to a switch on your transmitter:
Off Mode
The gyro is completely disabled, and the aircraft flies normally without any stabilisation.
Normal Mode
The gyro provides active stabilisation, smoothing out flight in windy conditions. If a wing drops, the gyro automatically levels it back up.
Lock Mode (Heading Hold/AVCS)
Once activated, the aircraft maintains whatever position you set. For example, you can establish a knife-edge pass, activate lock mode, release the sticks, and the aircraft will maintain that exact attitude.
Angle Mode (Trainer Mode)
This mode limits the aircraft’s rotation, preventing it from rolling or looping beyond a certain angle. Full aileron input will bank the aircraft but won’t complete a roll. Similarly, full elevator won’t allow a loop. This is ideal for training purposes.
Level Mode (Auto Level/Horizon Mode)
Similar to a failsafe function, this mode will automatically level the aircraft when activated. If you’ve lost orientation and the model has rolled over, hitting level mode will straighten things up and keep you level.
Hover Mode (Auto Hover)
This provides the same functionality as level mode, but when you release the sticks, the aircraft is brought to a vertical position (nose up) and maintains a hover. Essentially, this is prop hang at the push of a button.
User Mode
If the six standard modes aren’t enough, you can configure your own custom mode.
Installation Process
The Test Aircraft
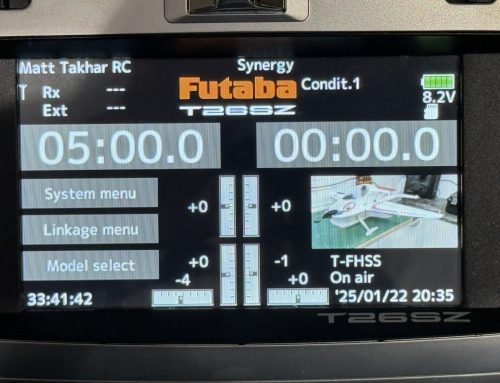
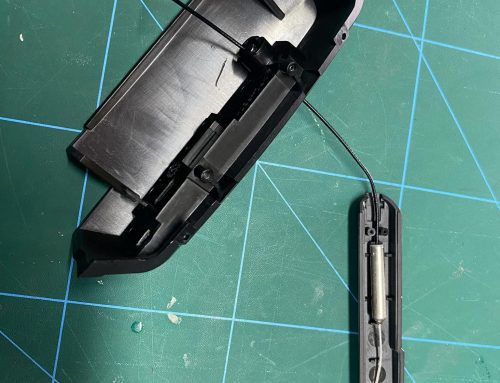
For this installation, we’re using an Avios Grand Tundra – a foamie that can handle up to 6S power. It features flaps, dual aileron servos, elevator, and rudder. The starting point is a fully functional aircraft with everything working correctly on a Futaba transmitter before the gyro installation.
Wiring the Gyro
The wiring process involves several steps:
Step 1: Connect Servos to Gyro Outputs
Disconnect the relevant servo wires from the receiver and plug them into the gyro outputs:
- Output 1: Aileron servo
- Output 2: Elevator servo
- Output 3: Rudder servo
Important: The throttle stays connected directly to the receiver. You don’t wire throttle through the gyro, as there’s no need to stabilise it.
Step 2: Connect Gyro to Receiver
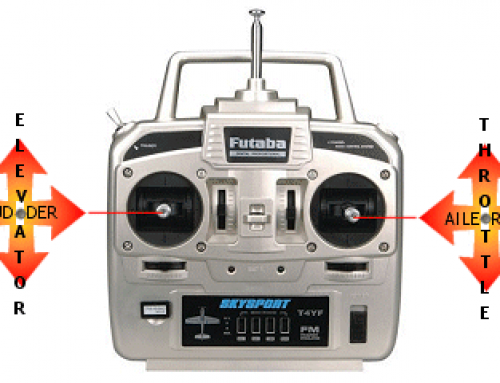
Use the provided split-wire harness to connect the gyro input port (labelled A E R) to the corresponding channels on your receiver. The wire colours correspond to:
- Orange: Aileron (Channel 1)
- Red: Elevator (Channel 2)
- Brown: Rudder (Channel 4 in this example)
Step 3: Power the Gyro
This is a critical step that’s easy to miss. The gyro needs power, which isn’t provided by the signal wires alone. Use the supplied straight-through cable to connect a spare port on the receiver to the port on the gyro labelled “Receiver”.
Warning: Do not plug power into the top two ports (E2 and G), as this will damage the gyro.
Step 4: Test the Installation
Power up the aircraft and verify:
- The gyro shows a light (red means powered but gyro is in off mode)
- All control surfaces still respond correctly to transmitter inputs
- Channels not passing through the gyro (like flaps) still function normally
Configuration Options
There are two ways to configure the gyro:
Option 1: PC Software
Download software to your PC and connect the gyro using the USB adapter and supplied cable.
Option 2: Programming Card
Purchase the dedicated programming card (approximately £47) that plugs directly into the gyro. Whilst this adds to the initial cost, bringing the total to around £60-70, it’s still considerably cheaper than high-end gyros. You only need one programming card for multiple gyros, and it’s convenient to take to the flying field for on-site adjustments.
Essential Configuration Settings
Receiver Brand/Protocol
This is the first setting to check if your servos aren’t working through the gyro. Navigate to the receiver setup menu and select your receiver brand:
- Futaba/Hi-Tech/WFly (same protocol)
- JR/Spektrum
- Graupner/Multiplex
- FrSky/OpenTX
Receiver Type
Select between PWM (individual channels), S.Bus, or other supported protocols.
Wing Type
Define your aircraft configuration: standard, flying wing, delta, or V-tail.
Mount Orientation
Critical setting that must match how you’ve physically mounted the gyro:
- Flat upright
- Flat inverted (upside down)
- On side (various options)
Gyro Direction/Reverse
This determines which direction the gyro correction acts. Before your first flight, you must test that when you tip the wing down, the gyro corrects it in the opposite direction (up). If it corrects in the same direction, you need to reverse that channel in the gyro settings.
Final Thoughts
The Hobbyeagle A3 Super 4 represents excellent value for money in the world of RC gyros. Whilst the initial setup requires attention to detail – particularly regarding mounting orientation and receiver compatibility – the comprehensive manual and affordable price point make it accessible for pilots looking to add stabilisation to their aircraft.
The programming card, whilst an additional expense, is highly recommended for ease of configuration and field adjustments. Even with this added cost, the total investment remains a fraction of premium gyro systems whilst offering comparable functionality.
Whether you’re looking to smooth out windy flights, add trainer mode capabilities, or even experiment with features like auto-hover, this gyro provides the tools at a price point that won’t break the bank.