Introduction
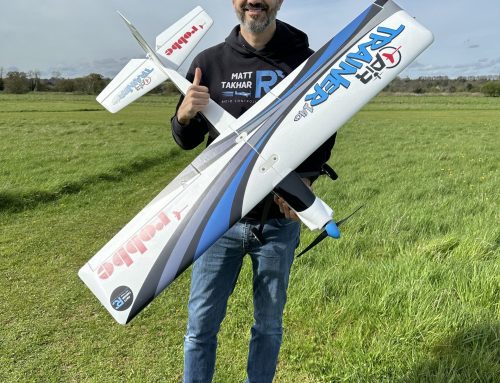
Today we’re doing something completely different – we’re tackling a repair on an Extreme Flight 67-inch Laser EXP v2. This is a really nice model that’s unfortunately had a bit of an accident, and rather than a typical assembly or review, we’re going to walk through the repair process step by step.
What Happened?
The damage occurred during the model’s maiden flight. Jack, a club member who’s been away from flying for a while, had just finished building this aircraft and took it out for its first flight. Everything went well until the landing – whilst coming in for a crosswind approach, the model drifted slowly across the runway and clipped the wooden fence at the edge of the field.
From where I was standing at the time, it looked like the aircraft might have got away with it. However, these 3D models, especially ones from Extreme Flight, are extremely lightweight. Whilst they’re incredibly strong for their weight, there’s not much structure inside them, and what appeared to be a minor impact actually caused significant internal damage.
The wing hit the fence first on the right-hand side, which twisted the fuselage into the post. This impact ripped the wings out and damaged both the wing connector mechanism and the inside of the fuselage.
Assessing the Damage
The Fuselage
At first glance, the fuselage doesn’t look too bad from the outside. However, opening it up reveals the real story:
- Missing pieces of wood on one side
- Cracked structural members
- A damaged wing quick-release mechanism
- A broken former (structural support) inside
- Some loose balsa wood pieces that need reattaching
The Wings
The wing damage is divided between the two panels:
Left-hand wing: The quick-release mechanism has pulled out, leaving the mounting hardware loose. This will need to be epoxied back in carefully to ensure it’s square and strong enough.
Right-hand wing: This is the panel that hit the post directly. There’s a visible dent and buckled covering on the surface. The good news is that the damage appears to be between ribs rather than on them, which should make the repair more straightforward.
The Repair Strategy
Honestly, I’ve never repaired one of these before, so I’m working this out as I go along. The plan is to:
- Start with the fuselage
- Remove covering around damaged areas to see what we’re working with
- Reassemble broken pieces using super glue (thin CA)
- Reinforce critical areas
- Deal with the wings afterwards
The main concern is ensuring the wing quick-release system goes back in properly – square and strong. I definitely don’t want that wing panel coming off in flight. That would be devastating and cause far more damage than we’re dealing with now.
Removing the Covering
Before any repair work can begin, I need to remove the covering material around the damaged areas. This is essential – trying to repair through the covering would be a mistake.
Tools and Technique
For this job, I’m using a sharp hobby knife with a brand new blade. Whenever I’m cutting covering, whether for repairs or during initial covering, I always change to a fresh blade. This ensures a super sharp tip that cuts cleanly through the material without tearing it or accidentally cutting into the wood beneath.
I carefully plan my cuts to follow the natural lines and formers of the fuselage where possible. This will make it easier to apply new covering later. The key is to:
- Cut along structural lines where possible
- Not cut into hollow areas that will be difficult to recover
- Leave a small lip of covering at edges for easier re-covering
- Take your time – rushing leads to mistakes
Once the covering is removed, the extent of the damage becomes much clearer. There are cracks I hadn’t noticed before, including splits through corners and some missing balsa pieces.
Rebuilding the Structure
The Puzzle Begins
With the covering removed, the repair becomes a bit like a 3D puzzle. Some pieces are still partially attached, which actually helps because they’re already in roughly the right position. The challenge is getting all the broken pieces back together without breaking them further.
I start by dry-fitting pieces to work out where everything goes. The more I touch some of these delicate broken pieces, the more they want to break further, so I need to be careful.
Gluing Technique
I’m using thin CA (cyanoacrylate) glue for this repair. This type of super glue is extremely thin – almost like water – which allows it to wick into tight joints and cracks. It comes with a very fine applicator tube for precise application.
The technique involves:
- Applying small spots of glue to hold loose pieces in position
- Using CA accelerator (kicker) when needed to speed up curing
- Building up the repair gradually, piece by piece
- Working from one area outwards to maintain alignment
Note: The kicker leaves a white residue on the wood, but this isn’t a problem as we’ll sand it off and cover over it later.
The Tricky Former
One of the most challenging parts of this repair is the broken former – the internal structural support that provides strength to the fuselage where the wing attaches. This piece broke in four different places:
- At the top
- Where it meets a horizontal former
- At the bottom
- Where it passes through the fuselage side
Getting this piece back in requires cleaning up all four break points with a sharp knife, then carefully manoeuvring it into position so all four sections key back into their respective locations simultaneously. It’s incredibly fiddly work, but essential for structural integrity.
Sanding and Smoothing
After the glue has cured, the repaired area is far from smooth. There are bumps, excess glue, and slight misalignments that need addressing. For this, I’m using a perma-grit sanding block, which has both a smooth and rough side.
Starting with the smooth side, I carefully work over the repaired area, using my fingers to feel for high spots and irregularities. The key is to use light pressure – the fuselage skin is very thin, and pressing too hard could damage it.
I’m also careful not to catch the covering material that’s still attached, as the perma-grit will scuff it up. Taking the time to sand properly now will make the final covering job much easier.
Assessing Strength
Once the super glue has fully cured, it’s actually stronger than the original balsa wood. If you’ve ever glued balsa with CA and then tried to break it again, you’ll know that the wood breaks next to the glue line, not through it.
However, there’s one area where I’m not entirely happy – there’s a slight kink in one of the formers that hasn’t quite gone back flat. If force were applied in that direction, it might break again. My solution might be to create a sandwich repair: placing a thin piece of material behind it and another in front, then squeezing them together to straighten it and leaving that brace in place.
Additional Reinforcement Considerations
Whilst the super glue provides excellent strength, I’m considering a few additional reinforcement options:
- Epoxy fillets around the repaired former for extra strength
- Carbon fibre strapping across high-stress areas
- Fibreglass reinforcement behind the wing quick-release mechanism
These additions would provide extra security, particularly in critical areas like the wing attachment points.
The Wing Repairs
The wing repairs will follow a similar process to the fuselage:
- Strip back the covering on the damaged right-hand wing to assess the internal structure
- Repair any broken ribs or supports
- Carefully reinstall the quick-release mechanism in the left-hand wing, ensuring it’s perfectly square and well-bonded
- Test-fit the wings before final covering
The most critical aspect is ensuring that wing quick-release system is absolutely solid. This is not something you want to fail in flight.
Reflections on the Repair Process
This type of repair work requires patience above all else. It’s not a job to rush. Whilst I’m making this up as I go along to some extent – I’ve never repaired one of these specific models before – the fundamental principles of model aircraft repair remain the same:
- Take your time to assess the damage thoroughly
- Remove covering to see what you’re really dealing with
- Work methodically, building up the repair in stages
- Use appropriate adhesives for the materials
- Test-fit components before final assembly
- Don’t be afraid to use additional reinforcement in critical areas
Having all the broken pieces certainly helps – this would be a different job entirely if we were having to fabricate replacement parts from scratch.
Next Steps
There’s still work to be done on this repair. The fuselage needs final sanding and smoothing, possibly some filler to build up areas where small pieces are missing, and then re-covering. The wings need their repairs completed, and everything needs thorough testing before this aircraft sees the sky again.
But from what looked like potentially serious damage, we’re well on the way to having this lovely Extreme Flight Laser back in flying condition. It just goes to show that with patience and the right approach, even seemingly significant damage can be repaired.
The key is not to be intimidated by the task – just make a start, work methodically, and the model will come back together piece by piece.