Introduction to Servo Balancing on FrSky ETHOS
If you’re working with FrSky ETHOS and need to get two or more servos moving together perfectly to control a single control surface, you’ll need to understand the servo balancing function. On other transmitters, this feature is typically called “matching,” but FrSky refers to it as “balancing.” In this guide, I’ll walk you through the entire process step-by-step, including a couple of tips that make the whole procedure significantly easier.
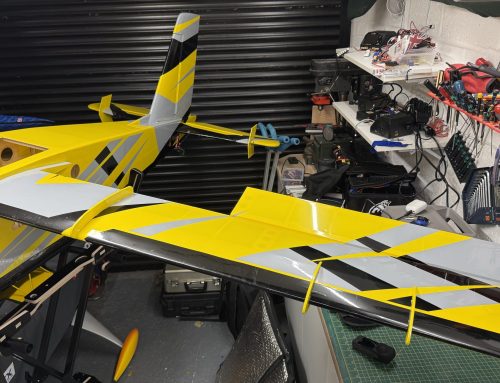
For this tutorial, I’m using a PAU Slick 360 with a TD18 receiver, which features dual 2.4 GHz antennas and built-in 900 MHz capability. We’ll be balancing the aileron servos – two per aileron – but this same process applies to any control surface with multiple servos, such as rudders or elevators.
Step 1: Name Your Output Channels
Before diving into the balancing process, I strongly recommend naming your output channels. This simple step will save you considerable confusion later on.
To name your channels:
- Navigate to the model memory (aeroplane icon)
- Go to Outputs
- Select each channel where your servos are connected
- Give them descriptive names
For example, on my model I’ve named my channels as follows:
- Channel 7: Aileron Right Out (outer servo on right wing)
- Channel 8: Aileron Right In (inner servo, closest to fuselage)
- Channel 10: Aileron Left In
- Channel 11: Aileron Left Out
This naming convention makes it immediately obvious which servos you’re pairing when you’re working through the various functions, rather than trying to remember arbitrary channel numbers.
Step 2: Physical Preparation
Before we start adjusting anything in the transmitter, we need to prepare the servos physically. Whilst the balancing function will work regardless of your initial servo positions, I recommend matching your pushrod lengths as closely as possible – it simply makes the process easier.
Here’s what you need to do:
- Disconnect the clevis from the control horn
- Remove the screw holding it in place
- Keep the bolt through the clevis – you’ll use this to line up the servo positions
The bolt becomes your reference point for checking alignment throughout the balancing process.
Step 3: Create a Temporary Mix (The Game-Changer)
This is the first major tip that makes servo balancing much easier: create a temporary mix using one of your potentiometers. This allows you to move the control surface to exact positions gradually, which is far more practical than trying to hold the stick at precise points.
Setting Up the Temporary Mix
Navigate to Mixes in the aeroplane menu and follow these steps:
- Press the plus button to add a new mix
- Select Free Mix
- Choose Last Position for the mix placement
- Leave it set to Always On
- Set the Source to S1 (or your preferred pot)
- Select Analogue, then go into analogues
- Change from “Rudder” to Pot One
- Press return twice to confirm
Now set the outputs:
- Set Channel Count to 2 (for two aileron servos)
- Output 1: Select your inner aileron servo (e.g., Channel 8 – Aileron R Inside)
- Output 2: Select your outer aileron servo (e.g., Channel 7 – Aileron R Outside)
Checking Servo Direction
When you move the pot now, both servos should move. If one moves in the opposite direction, you’ll need to reverse it:
- Go back into the mix settings
- Find the Reverse option for the affected output
- Enable the reverse for that channel
Both servos should now move in the same direction when you adjust the pot.
Step 4: Adjust Sub-Trim
With your temporary mix active, it’s time to set the sub-trim for proper servo centring.
- Navigate to Outputs
- Select the channel you want to adjust
- Scroll down to Sub Trim
- Press enter to access it
Now adjust the sub-trim value whilst checking your servo physically. The goal is to adjust it until the bolt on your disconnected pushrod easily lines up with the hole in the control horn. When it drops in smoothly without force, you’ve got the sub-trim correct for that position.
Step 5: Set End Points
Once your sub-trim is correct at centre, you need to check the end points:
- Use your temporary pot mix to move the control surface to one extreme
- Check if the bolt lines up with the hole in the control horn
- If it doesn’t align, go into the End Points section (Min and Max)
- Adjust the appropriate end point until the bolt drops in easily
- Repeat for the opposite end point
The Min and Max values (typically around -100% and +90%) are essentially your travel limits in either direction. Adjust these until the bolt aligns properly at both extremes.
Step 6: Use the Balance Function
Now comes the crucial part – the actual balancing. This is where ETHOS really shines, allowing you to create a custom curve that perfectly matches both servos throughout their entire range of movement.
Accessing Balance Channels
- Return your pot to the middle position
- Stay in the Outputs menu
- Select one of your servo channels
- Scroll to the bottom where it says Balance Channels
- Select the two channels you want to balance together
- Confirm with OK
Configuring the Balance Curve
You’ll now see both channels represented in boxes at the top of the screen. Here’s how to proceed:
- Select one of the channels (I typically start with the outer one)
- Hit the cog icon to access settings
- Set the number of points – I recommend 9 points for precision
- Enable Smooth for smoother transitions
- Press OK
Matching the Servos Point by Point
This is where your temporary pot mix proves invaluable. As you move the pot, you’ll see a line moving across the curve with multiple points marked. Here’s the process:
- Move the pot to position one point on the curve
- Tap that point on the screen
- Press OK to enter adjustment mode
- Physically check if the bolt lines up with the hole in the control horn
- Use the adjustment dial to move that point up or down on the curve
- Keep adjusting until the bolt drops in smoothly
- Press OK to confirm
- Move to the next point and repeat
Work through all nine points (or however many you’ve chosen) across the entire range of servo travel. At each point, you’re fine-tuning the relationship between the two servos to ensure perfect synchronisation.
Important note: Even if your servos appear well-matched initially (as mine were due to careful pushrod matching), you’ll likely still need some adjustment. The real power of this function becomes apparent when you’re working with servos that have completely different geometry or mounting positions – the balance curve compensates for these differences perfectly.
Step 7: Clean Up
Once you’ve completed the balancing process, there’s one final housekeeping task:
- Navigate back to Mixes
- Find your temporary free mix on Pot One (it should be at the bottom of the list)
- Select it and press Delete
- Verify that moving the pot no longer affects your servos
Your servos are now perfectly balanced and will move in complete synchronisation throughout their entire range of motion.
Summary: Key Tips for Success
To recap, here are the two most important tips that make this process significantly easier:
- Name your channels first: Descriptive channel names like “Aileron R In” and “Aileron R Out” make identifying the correct channels much easier throughout the setup process
- Create a temporary pot mix: This allows you to move your control surface gradually and precisely to each balance point, rather than struggling to hold a stick at exact positions
The FrSky ETHOS balance function is incredibly powerful, capable of perfectly synchronising servos even when they have wildly different geometry or mounting positions. Once you understand the process, it becomes straightforward and ensures your control surfaces move smoothly and precisely.
Whether you’re setting up ailerons, rudders with dual servos, or any other control surface requiring multiple servos, this same process applies. The investment of time in properly balancing your servos pays dividends in flight performance and control surface longevity.